How To Make Folders In iPhone ? (Applicable For All iPhone Models !!)
It is indeed important to arrange the apps and documents in well-managed groups on your iPhone. So in case you want to edit any video or want to listen to any song, you will directly tap on the folder containing all the songs or video related apps .
This not only enhances usability but also ensures that you can reduce the actual time searching the apps in your iPhone screen. In this post, we will explore the steps to make folders in iPhone quickly.
A folder is precisely a group of apps (similar apps merged together) . Having folders basically help to reduce the number of iPhone home screens (by reducing the number of individual apps).
The steps are really very straightforward and simple. Without wasting any further time, let us dig deep now.
How To Make Folders On iPhone?
The mentioned steps are applicable to any iPhone models you use (irrespective of the iOS version) . And also do remember that you should have atleast two apps in your iPhone home screen to make a folder .
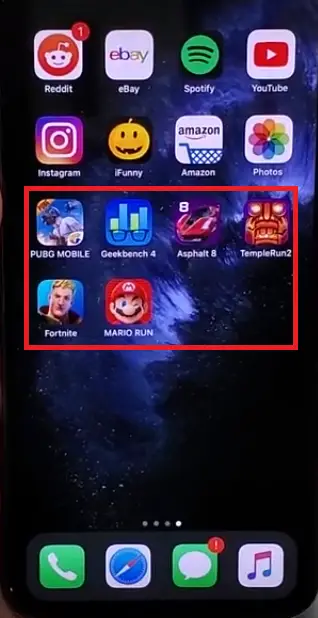
In our case, we will demonstrate each step by taking gaming apps example. (you can try with any other types of apps)
So just follow the steps as mentioned below to create folders in your iPhone :
1. Tap (lightly for few seconds until you see apps bouncing) on the app (which is not already inside any folder) that you want to merge with the other in your iPhone home screen.
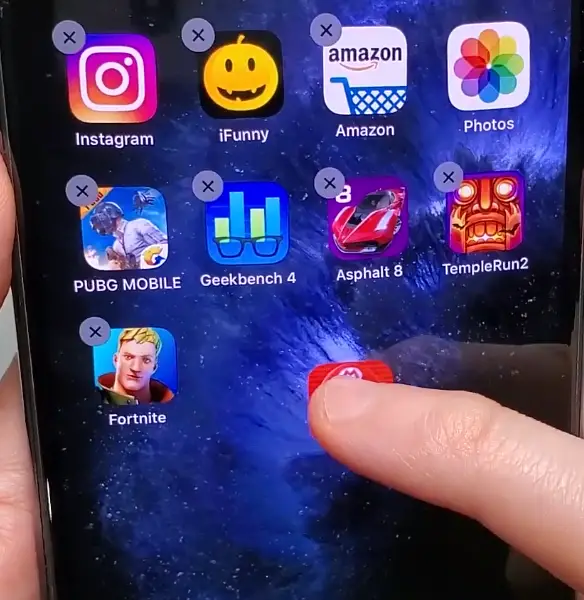
2. Once you light tap on the app , you can see all the apps start bouncing/shaking (in a similar way when you do apps rearrangement)
3. Now once you tap the app , drag it and then place/merge it above the other app (that you want to include in your folder)

4. Once you place the app on the other app, you see a screen with the folder and its suggested name take up the entire screen of your iPhone (default name as ‘Games‘ here)

5. Now still inside the folder the apps will bounce as earlier, to stop those from bouncing, just press ‘Home‘ button
6. Once you press ‘Home‘ the new folder gets created (and all apps stop bouncing) along with the default folder name (while merging similar kind of app types, your iPhone simply suggests and keep a default folder name which is editable)
7. Then continue repeating the same process (tap and drag app into this folder) to include more apps in this folder.
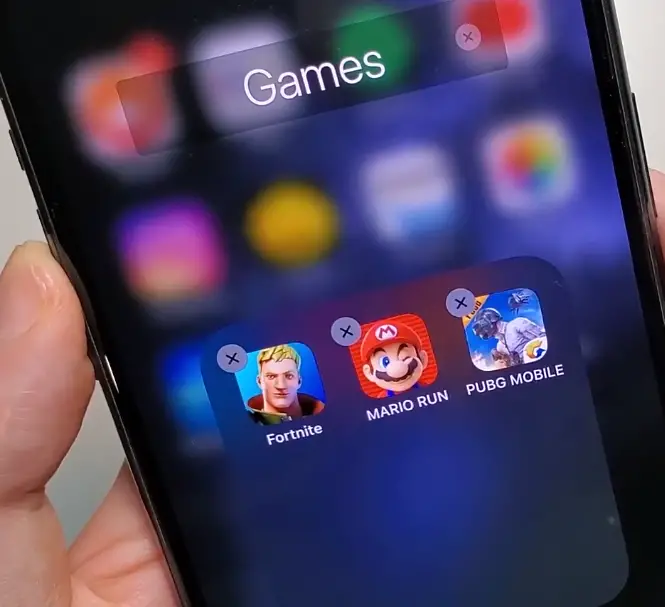
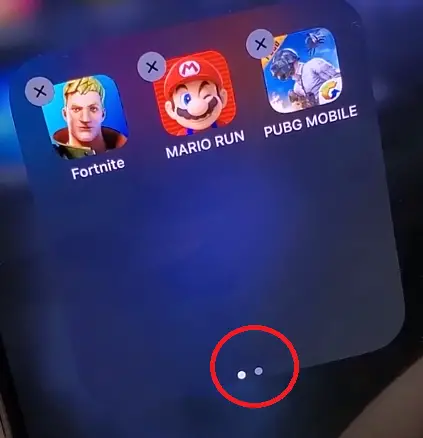
Note : When you press the ‘Home‘ button, then only all the changes will get saved. A folder can have multiple pages in it depending upon the number of the app in it .
You just need to swipe your fingers right to left to view the second page of your Folder
How To Edit And Delete Any Folder On iPhone?
Once the folder gets created you may now want to rename it or delete it altogether. This too can be achieved in a few simple steps :
1. Once a folder has been created, you can easily modify it as per your requirements.
2. As already discussed, you can simply drag and drop the apps inside the folder to include in it.
3. To remove any app, just tap on the folder and tap on the app that you want to remove. Drag the app out of the folder.

4. So if you want to delete the complete folder , you need to individually hold and drag all the apps out of the folder and finally press the ‘Home‘ button (once you remove all the apps, the folder will vanish)
Now to rename any previously created folder, you can use either of the below two ways .
1. You can easily rename the folder at the time of creating it . While creating a new folder as already seen, your iPhone suggests a default name to the folder (step 4 in the first section) .
There just edit the folder name (by tapping on it) and hit ‘Done‘. Then finally press the ‘Home‘ button to save the changes.

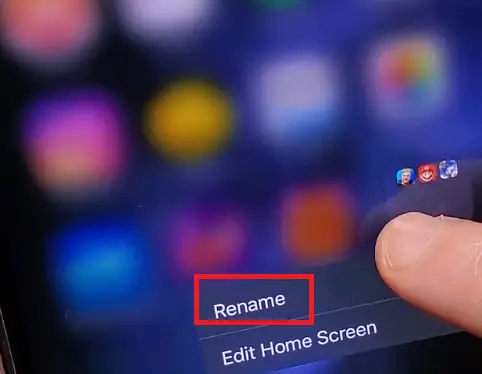
2. Now if you have already created a folder and want to make changes in this existing folder, then also it’s pretty easy. Just go ahead and light tap on the folder in your iPhone home screen. Then you can see two options .
Just drag the folder to ‘Rename‘, then just edit the folder name . (you can also do this by opening the folder and then edit the name)
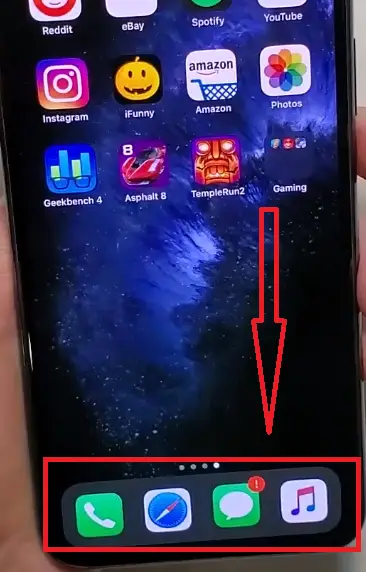
Note : You can even tap on any folder, then drag and drop on your iPhone dock . This can further improve the usability
How To Create Folders To Manage Your Photos On iPhone?
Many times you simply want to segregate your photos and videos based on some occasions or depending upon your business and family pics/special moments indeed .
To do this we can create multiple folders inside a photo album easily.
Note : If you create multiple albums in your iPhone, then it will create congestion (due to a large number of folders in your root level directory which is system-specific) . So it is advisable to create multiple folders in one Album.
Follow the steps as follows :
1. Tap on the ‘Photos‘ app in your iPhone home screen
2. Tap and hold the ‘+‘ symbol at the left top corner of the screen (long press until you see two options in the screen)
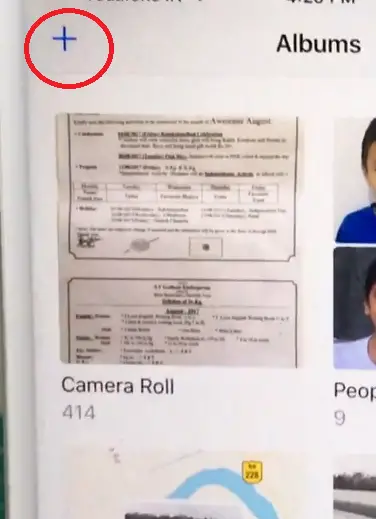
3. Now you can see two options ‘New Album‘ & ‘New Folder‘
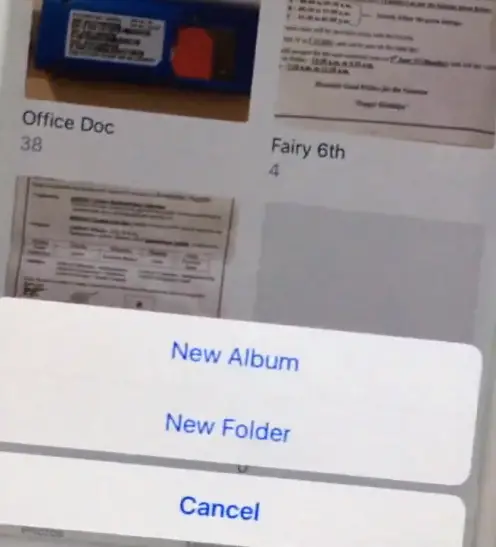
4. Enter the name of your new ‘Folder‘
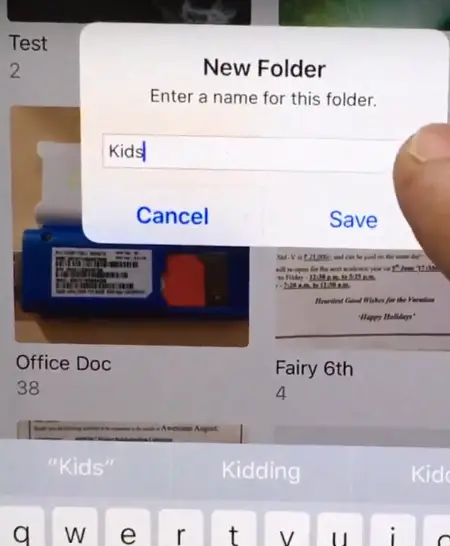
5. Now inside your new ‘Folder‘ you can add multiple ‘Albums‘
6. To add album, tap on the new folder that you just created (must be empty)
7. Now tap and hold the ‘+‘ symbol at the top left corner
8. Now enter the name of the new album
9. Then you will be prompted to select the images and videos that you want to keep inside this album (inside the new folder)
Finally, all done. You can now keep all your photos to this newly created folder (in any Album inside that) .
I hope you really liked this post. Stay tuned for more interesting stuff in this series.

Aric is a tech enthusiast , who love to write about the tech related products and ‘How To’ blogs . IT Engineer by profession , right now working in the Automation field in a Software product company . The other hobbies includes singing , trekking and writing blogs .

