How To Use A Dropbox Like A Pro ? ( File Sharing With Dropbox – Complete Guide)
Since you are reading this, so it can be ideally assumed that you are a newbie who has just started exploring the feature-rich cloud storage application i.e. the Dropbox. So before we start exploring this application, we will first start with the basic overview.
If you have already used the Windows file explorer previously, then you may feel the Dropbox application is very much similar to it . So sit back and enjoy reading this guide on how to use a Dropbox application. (along with the file sharing in Dropbox guide)
What is this Dropbox application ?
Let us first understand what exactly this Dropbox is? . So this is basically a cloud storage application (like the Google drive , Onedrive etc) .
So if you have limited space available in the hard disk of your system, you can right away start using these cloud storage application . The biggest advantage of using this application is indeed the security and reliability.
Even though you lost your system, or some damage occurred to your PC , if your files backed up in the Dropbox , you can easily retrieve it in some other system , or by directly accessing the Dropbox site i.e dropbox.com url .
By using this application, you can able to access the files in any system (PC or mobile) anywhere in the world (you should have access to the internet for sure). The files will get stored in the cloud .
So in this guide, we will mainly look into the basic high-level functionalities you need to get started with this great application quickly .
Moreover, if you want to enjoy some more advanced features along with more storage capabilities, then you need to spend some penny on a monthly basis.
So without wasting your further time , let’s start to dig deep inside this tool .
Dropbox Account Creation – The First Step !!
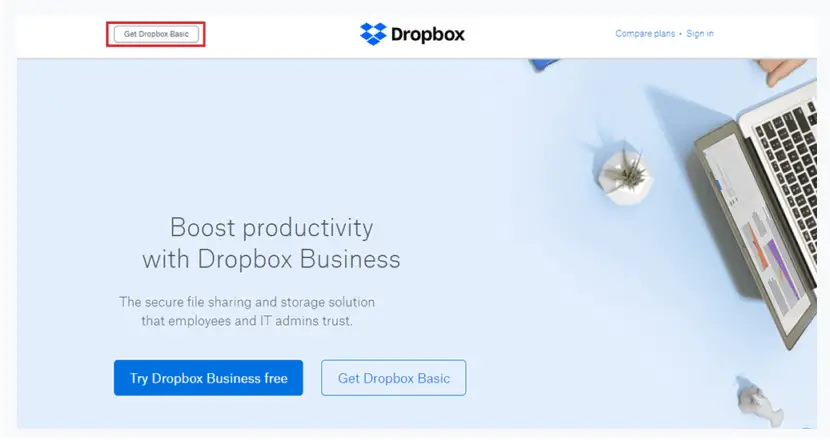
So for this directly go to the Dropbox site and create your account by giving the relevant details . Follow the below steps :
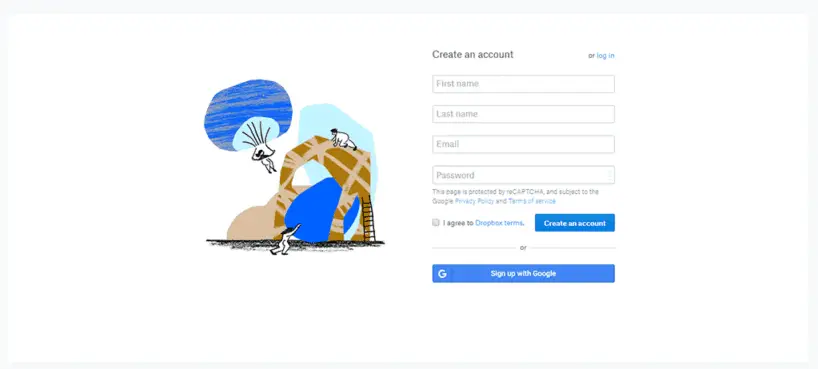
1. Hit the url of the Dropbox account creation page, click on the signup option (new user registration) . Give necessary details like the active email address, full name, password etc
2. Now its time to download the Dropbox application right away in your local system and save it . Now open the application and log in with the same credentials you gave in the above step while signing up .
3. After starting the application, it will show you some initial tutorials and steps to use this application, then it will finally ask you how to manage files in this application locally or online.
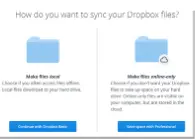
4. So these two option is very important i.e. whether you want to keep your files locally (free service) or online only mode (paid service) . Both these option we will explain later here .
5. Now after selecting the right option , you can see the Dropbox folder has been created and you can right away share and add files to it whenever you want (based upon your storage limitation based upon your opted plan)
So once you start adding the files, you can easily access the same in any system anywhere by using the Dropbox application . You should have an active internet connection no doubt . So now let us understand the basic difference between the local and online-only options seen above.
If you choose the local only option which is completely free , then the files will get saved into the Dropbox application , also one copy will remain in your local machine . So this eventually not free up space from your hard disk of your PC .
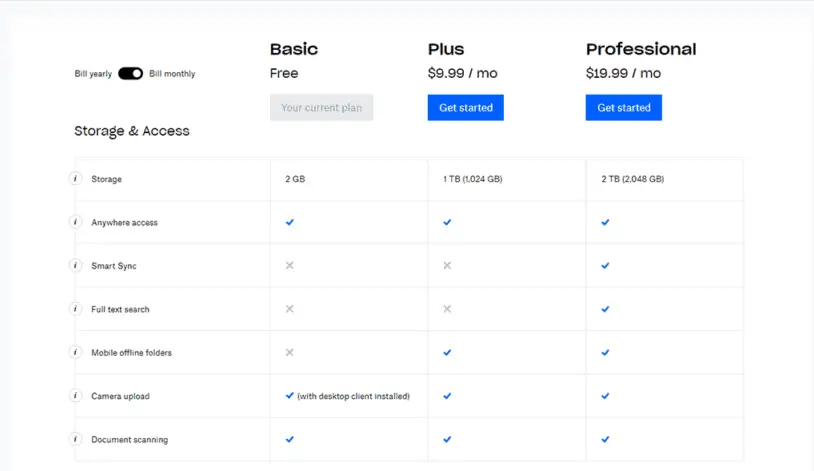
So here comes the solution, if you choose the online-only mode, you have to pay for it . Also, it will offer you the cloud-only features, i.e. it help you to free up space in your hard disk . For this, you have to spend around 20$ monthly (much less if you pay for a year upfront) .
How to add / Upload files into Dropbox ? (complete steps for sending any file into Dropbox)
So once you get into this cloud storage service , you should now want to use it to its full potential (isn’t it ?) . We will first start with the most basic feature of adding any file into Dropbox by following the below-mentioned steps :
1. Once your Dropbox folder gets created, you can easily add files and sync it with all the Dropbox installed devices in which you want to access the respective file later.
2. The Dropbox folder will be present in the Windows file explorer and also present in the quick access in any Windows system.

3. So now if you want to add files from your local to the cloud, then simply drag the file into the Dropbox application, also you may select the desired files and copy it , then paste it to the Dropbox folder right away.
4. If you want to add multiple files into the Dropbox, then press ‘Ctrl‘ button and select all the files by clicking on them and then finally copy and paste it to the Dropbox folder. (or click and drag one of the files to move all those selected into the Dropbox folder)
5. Once all the files put into the Dropbox folder now you will see a blue icon in the lower-left with arrows on it. The icon means it is copying the file and uploading it to the cloud.
Once it’s done, the icon will turn green and display a checkmark. After this step you may rest assure that all the files will be getting synced perfectly in the cloud .
6. So now if you want to save a newly created file into Dropbox , then you can easily do so by clicking on the save option and directly navigating into the Dropbox option folder on browsing through the file locations .
Then if you want to access the file, then just open the Dropbox folder and open it normally .
7. Once any file saved into Dropbox , you don’t need to worry for the uploading and syncing part as it will run in the background immediately, provided you are connected to the internet .
If not then the Dropbox icon will be grayed out and the status indicator will say “Connecting…” until you’re able to reconnect and finish syncing. This way you’ll always know if your files are available on every device .
8. Also while saving any file/files into the Dropbox application you can view the status at the bottom in the form of a blue syncing icon .
If you click the icon, a small window will pop up. In this, you can see the remaining files and expected time for the completion of the syncing process . Also, you may see the recently synced files here .

How to delete files in a Dropbox ?
Before deleting any file or folder from the Dropbox web client , just keep in mind that it will delete the respective file or folder from everywhere in the cloud . So if you are perfectly determined to delete it , then only proceed with this step .
So if you really want to remove the file from your Dropbox account then just follow the normal steps :
1. Open your Dropbox folder and select the folder/file you want to delete .
2. Now right-click it and select the Delete option.
After this, you will be unable to access it from any computer or device afterward.
However, as long as you have not permanently deleted the folder from your trash bin, you can return it to your Dropbox folder and it will re-upload to the cloud by following the previously mentioned steps .
How to use Dropbox for file sharing ? (file sharing via Dropbox)
Sharing a file or folder from your Dropbox with any other person or some other individual is very easy and simple . Once you uploaded the files into Dropbox , you can now go ahead and share the required stuff with others .
You just need to follow the below steps (different ways) in your desktop web client :

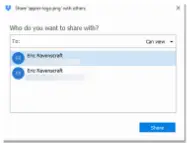
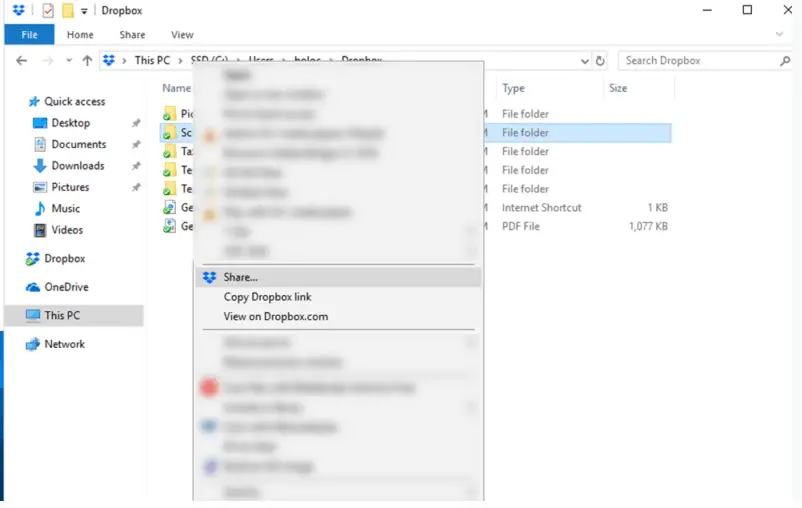
1. Just hover your mouse over the file you want to share ,then right click and select the option ‘ share ‘ in the menu options , then in the pop window it will ask you the email address of the recipient with whom you want to share . Then, grant the permissions you want.
They can be set to view only or given the ability to edit the file . (Anyone will be able to access your file once you’ve shared it. A Dropbox account is not required to open the link.)
2. Now if you don’t want to share the Dropbox link over email, then there is another simpler way. You may simply right-click on your file and select ‘copy Dropbox link‘ .
Then finally you can directly share this Dropbox link with someone else .
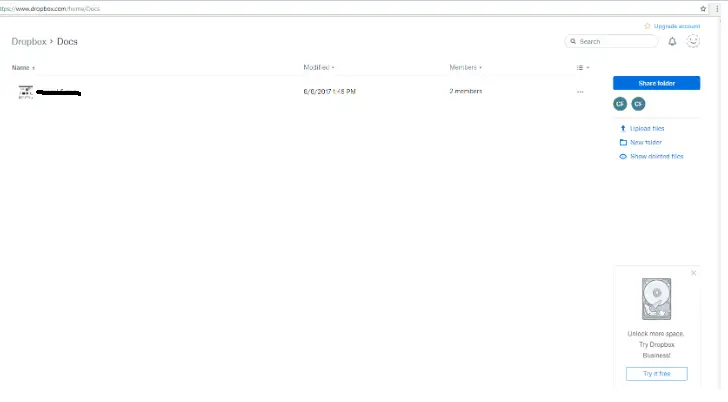
3. Dropbox also enables an option to have a shared folder feature. This is really helpful if you are working with a team of members .
So in order to share files via Dropbox with this feature , for this go back to your Dropbox home page and click on the option ‘ Shared Folder ‘ (top right corner) .
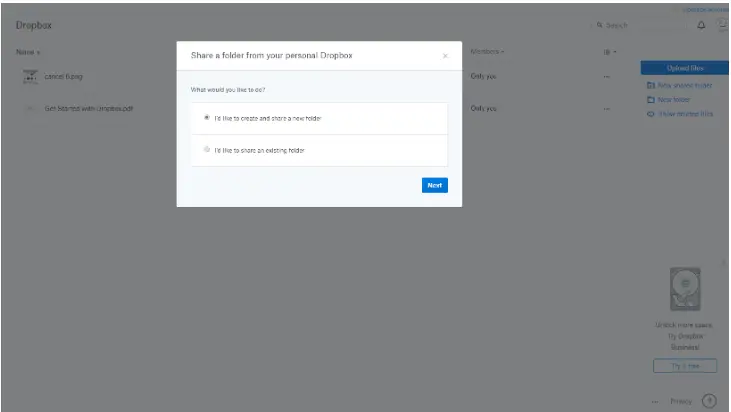
A window will open, asking you to create a new folder or share an existing one. Select your preferred option and click ‘Next’.
Name your folder and enter the email of the persons you want to share it with. It will then appear under the ‘Shared Folder’ category.
The persons you’ve shared your folders with will be able to download the content, comment on and edit the files (based on the permissions you have set) .
Sharing files with Dropbox in any mobile or from the web
If you want to share any file from any mobile or web , you have to follow the below steps :
1. Hover the mouse over the files you want to share , now right click and select the ‘ Share ‘ option . On mobile, you’ll have to tap the three-dot menu button and tap Share .
2. Now in the pop up window , you need to enter the email address of the person you want to share it . You can enter a message if you want, then click Share.
3. Moreover , at the bottom of the box, you may click on the Create a link to generate a shareable link that you can message to anyone you want. Click Copy link and then paste it in the messaging or email app of your choice.
How to use the Dropbox Sync Feature ?
It may happen that there is some space restrictions in the devices with which you want to share the files. So in this situation, you can literally want to sync all the files in your Dropbox application . So for this, you may opt for the Dropbox selective sync feature.
With this selective sync feature, you can now sync some specific files like the movies, songs etc but you don’t want to sync the confidential documents into Dropbox. In order to activate the Dropbox selective sync feature, you have to follow the below steps :
1. Access the settings section in your Dropbox application (in the system tray) . Then click on the preferences option .
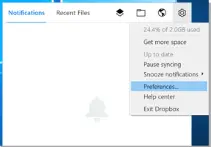
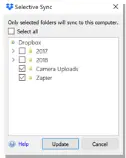
2. It will view the sync options , on the Sync tab in the window that appears, click Selective Sync . In the window that appears, check the box next to each folder you want to sync. Leave any folders you don’t want to sync unchecked.
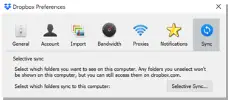
3. Once you implemented this option , the selected folders will remain synced in all your devices , and the other unchecked folders will be deleted from the Dropbox storage space .
If you again want to download the documents, you have to follow the steps as mentioned previously .
How to Restore Deleted Files in Dropbox ?
Once you delete the files from your Dropbox application, there will be a copy of the deleted file which will remain for 30 days . You can find them by clicking on the “Files” tab on the left side of the web client. From that page, click on the “deleted files” tab on the left side .
For higher upgraded versions , Dropbox retain your deleted files for 120 days after you delete them . You can restore it within this period .
Once you click on the deleted files option, click the empty checkbox to the left of the icon before the file name. When you click one of those checkboxes, it turns blue and a button that says “restore” appears on the right side of the page.
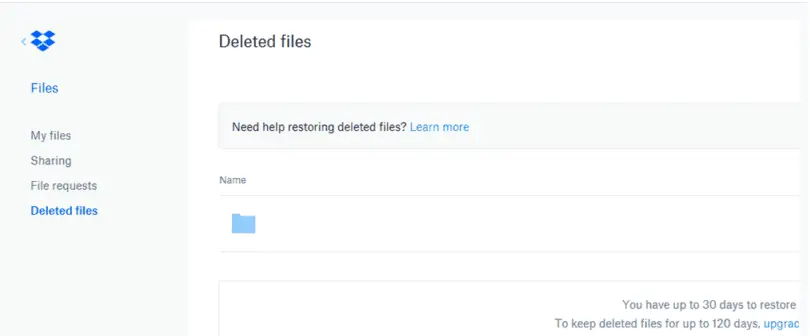
There is also an option for permanently delete the deleted file . If you click on the checkbox for permanently delete the file . Do remember that once you clicked on this option , you can never able to restore it again .
How to Request Files With your Dropbox application ?
With the Dropbox application, you can invite other individuals to use this wonderful application . If they don’t have Dropbox yet .
Then you just send them the file request link via Dropbox by mailing them. This feature is helpful if you want to get some important updates from all your teammates or workplace colleagues .
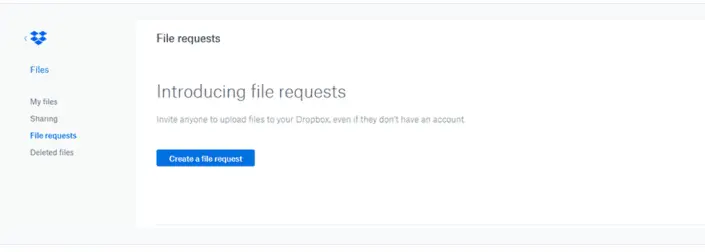
To request a file, log in to your online Dropbox account. Click the tab labeled “files” on the left side of your screen, then select the “file requests” link .
On clicking the request link , it will ask you two things i.e. the file names you want from them and folder where you want the Dropbox to put them after receiving. Finally, you have to click on ‘ Next ‘ option .

By default, it creates a folder named “file requests” in your main Dropbox folder, then a folder in that with the name you entered above.
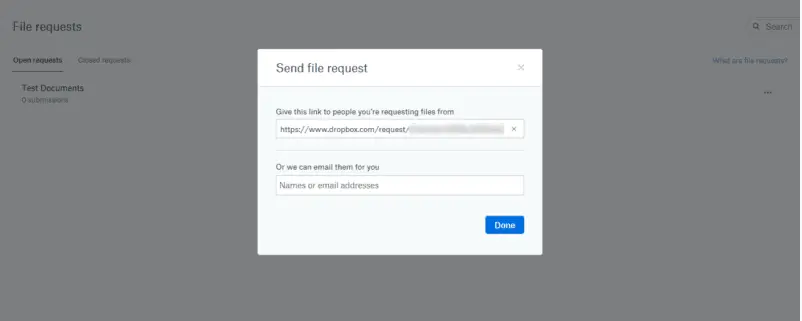
Now you may enter the recipient’s email address to whom you want to send this request link or you can directly copy the requested link and share it manually with others .
Dropbox – The Final Conclusion !! (Is it really worth it ?)
Dropbox is indeed a useful cloud storage application where you can precisely keep all your backed up files and documents securely which you can access later from any system from anywhere easily . You may buy the higher upgraded versions which can eventually increase the storage and the other advanced features.
Hope you really enjoyed reading this post . Stay tuned for more interesting stuff in this series .

Aric is a tech enthusiast , who love to write about the tech related products and ‘How To’ blogs . IT Engineer by profession , right now working in the Automation field in a Software product company . The other hobbies includes singing , trekking and writing blogs .

