Snipping Tool Mac Functionality – The Ultimate Guide !! ( Snipping Tool In Macbook Pro )
In today’s digital world, screenshots indeed an inevitable part in conveying an important message like to depict any bug , error message etc . In Windows devices, we do have a dedicated screenshot capture utility called Snipping Tool . (Mac users don’t be sad now :-p)
In this post, we will explore the Snipping tool Mac functionality, which is by default present in the Mac OS devices. Also, we will look into the other Snipping tool alternatives later in the post.
So if you have recently switched from Windows to Mac OS , don’t worry much. You can still enjoy the great features of Snipping tool here (along with the additional features) .
In Mac, you can even record your screen seamlessly along with the required free form snipping.
Moreover , there are many third-party screenshot capturing applications present to choose from . So you are not left with only one option precisely. We will also look into the best of these snipping tool alternatives later here. So sit back and enjoy reading.
Snipping Tool For Mac – Is There Any Keyboard Shortcut Present ?
This is undoubtedly the newest feature introduced in the macOS Mojave in 2018. Now you can enjoy your favorite snipping tool utility in the Mac OS too .
This feature further comes with the add on of capturing the live recording of your Mac screen . So for launching this screen capture toolbar ,
1. Press Shift + Command + 5 (press ⇧⌘5) then you can see a small toolbar at the bottom . This is nothing but the snipping tool kit newly introduced in the macOS Mojave in 2018 . (explained in detail later in the post)
Earlier if you want to take screenshots in Mac , then you have only two options available i.e. either in full screen mode or for a specific region by using the below keyboard shortcuts :
1. Press Shift + Command + 4 , then you can take the screenshot for a selected region or a specific area.
2. Press Shift + Command +3 , then you can take the screen capture of an entire screen .
Note : The above shortcuts still in use for the Mac OS .
How To Take Screenshot On Mac Using The Built In Snipping Tool ? (How to snip on Mac)
Although Windows also supports this functionality, in Mac, you will get this along with the additional functionality of recording your screen right away .
Now let us look into the steps for taking the screenshots using the snipping tool in Mac OS :
1. In order to launch the Snipping Tool utility , you have to hit the magic combination in your keyboard i.e. Shift + Command + 5 , ( press ⇧⌘5 )
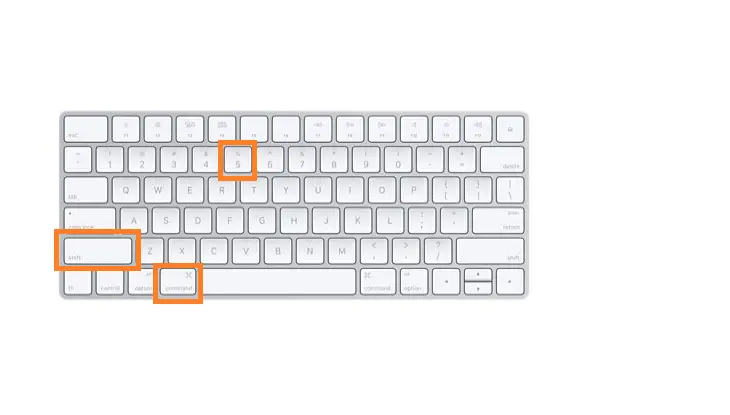
2. On pressing the above-said combination , you can view a small screenshot toolbar comes up in the lower part of the screen . In this, you have to select the required option that you want to snip on Mac .
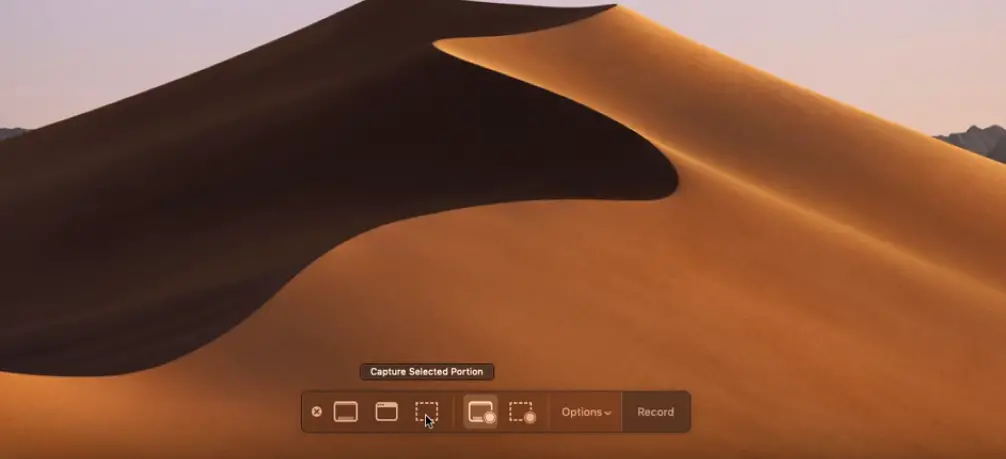
3. The various options present in the toolbar is as below :
- Capture entire screen
- Capture selected windows
- Capture selected portion
- Record entire screen and
- Record selected area
You can also find the ‘Options‘ menu , from where you can access other advanced options related to your screenshot (like timer , mouse pointer visibility, save path etc)
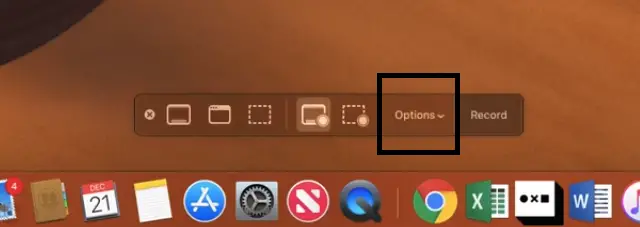
Note : Snipping tool for Mac really very features rich as compared to its Windows counterpart. You can even get annotation and screen recording capabilities here ( however you miss the Freeform capture at the same time) .
4. Now depending upon the selection, you can perform different screen capturing features . So if you select ‘Capture entire screen’ , instantly a full screen screenshot will be captured (unless a timer is set) .
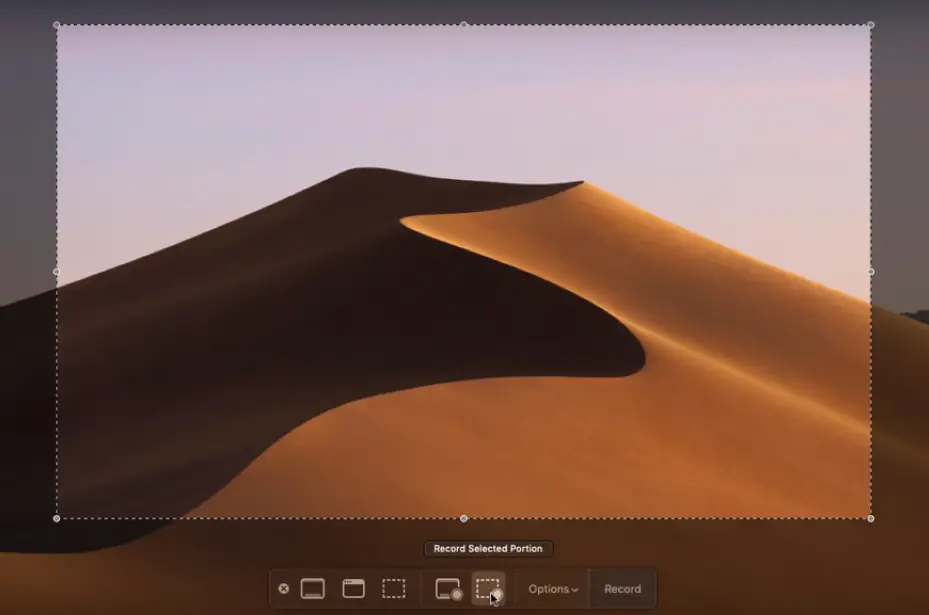
5. Now if you select ‘Capture selected portion‘ , you now need to select the area you want to capture as your snip in Mac (by setting the dimensions as shown below).
So for this click on your window or select your screen portion if you chose to capture something other than your whole screen. Your screenshot will be taken as soon as the selection is made.
6. After taking the screenshot click on the ‘Capture‘ option at the bottom toolbar , then the screenshot will appear in the lower right corner of the screen .
Now click on it to open the screenshot, then apply any annotation as required and save it to the required location in your Macbook after clicking on ‘Done‘ .
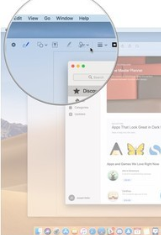

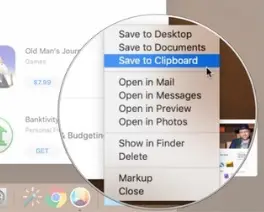
Note : You may also do right click on the screenshot appearing in the bottom right corner , then select among the various options you want to perform (select location to save it , or edit it using the Markup option)
How to edit screenshot using the Snipping Tool in Macbook Quickly ?
So now if you want to edit the captured screenshot, follow the below steps :
1. Press Shift + Command + 5 , then select an option for example ‘ Capture selected portion ‘ , then select the region you want as screenshot, then right-click on the screenshot appears in the lower right corner of your screen , then select the option ‘MarkUp‘ .
2. Now a window will open , where you can see the toolbar at the top section , from here you can choose various options to annotate, draw or write, highlight, include shapes, add text or a signature or select text styles using the toolbar at the top of the Quick Look window.
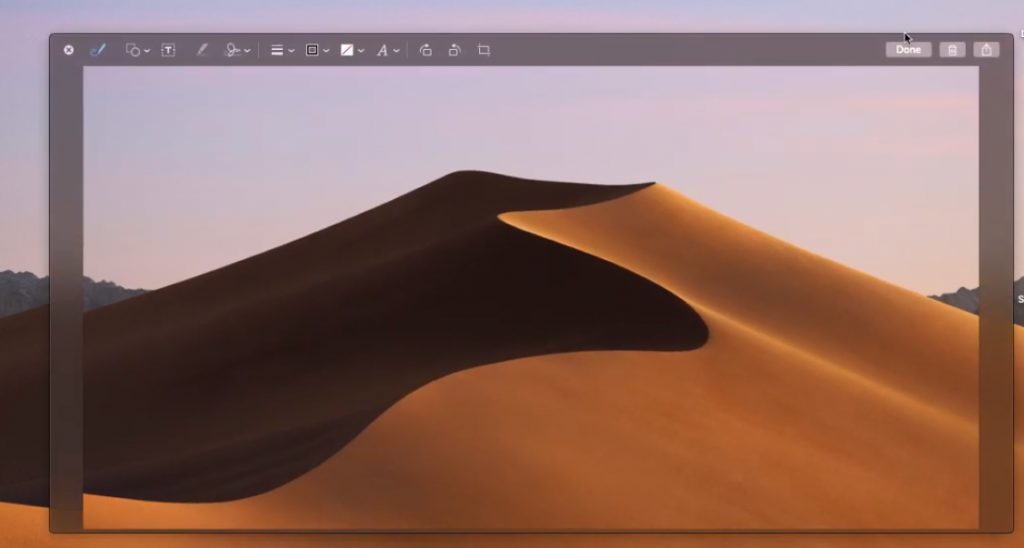
3. Finally save the desired screenshot in the location as selected by you . So we are done here (click on done) .

How To Set Timer and show the mouse pointer in your screenshot in Mac OS ?
Do you know that you can even set the timer to capture your favorite screenshot. So follow the below steps to set timer while capturing the screenshot using the snipping tool in Mac :
1. Hit the button combination ‘Shift + Command + 5 ‘ , then you can access the screenshot toolbar at the bottom , then select any screen capturing option .
2. Then right-click on the screenshot appearing on the bottom right corner of the screen . Now you can see different options for the timer .
By default, it will be ‘ None ‘ . Also if you want you can change it to 5 sec or 10 sec in order to delay the capture process .
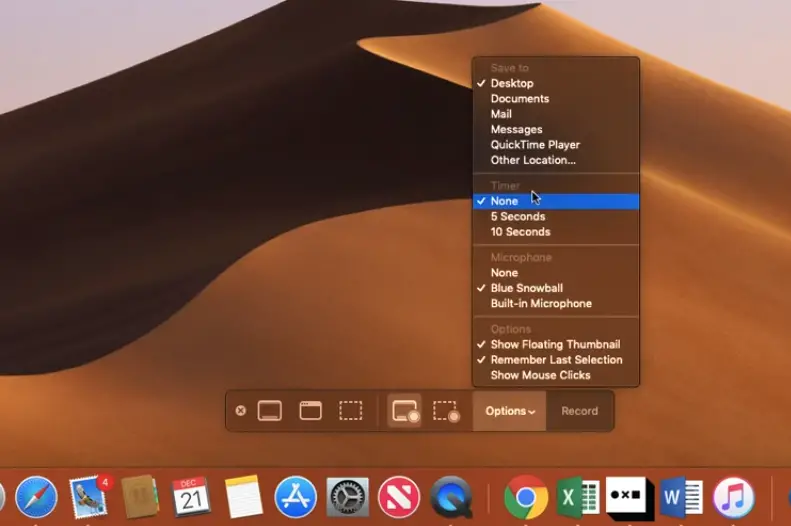
So once you set the timer , we can now proceed further to see the way in order to unhide the mouse pointer while capturing a screenshot . Follow the below steps :
1. Press Shift + Command + 5 , then in the screenshot toolbar at the bottom , click on the ‘Options‘ and then select the option ‘Show Mouse Pointer‘ .
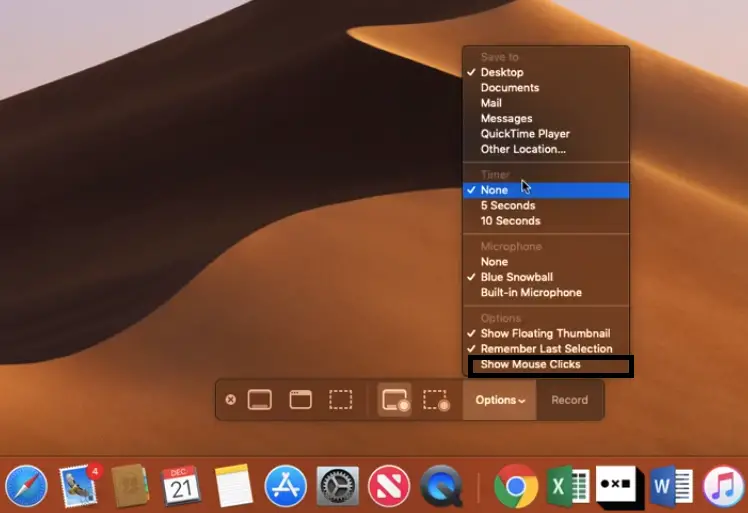
Note : This is really helpful when you want to showcase some crucial snippet in your captured screenshot .
How To Record a Screen Using the Snipping Tool in Macbook Pro (Mac OS) ?
So now we are interested in capturing a recording in our Macbook using the snipping tool functionality. In order to take the recording, follow the below steps :
1. Press Shift + Command + 5 , then in the screenshot toolbar at the bottom there are two options present i.e. to record full screen or to record a selected portion of the screen .
Your recording will begin immediately if you select Record Entire Screen.
2. If you select the second option i.e. Record a selected portion of the screen , then you have to select the region by dragging the borders of the dotted lines that appears in the screen .
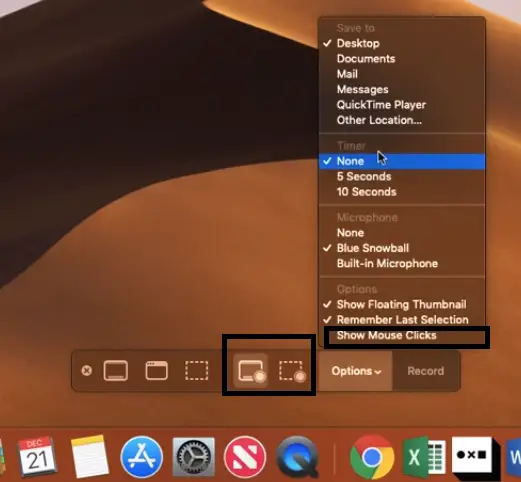
3. Click Record on the screenshot and recording control bar . Now once the recording will start , in order to stop the recording just click on the ‘Stop‘ button present at the top menu bar .
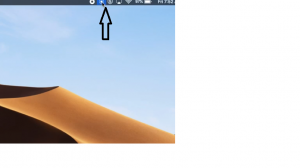
4. Once recording is done, it will appear in the lower right corner of your screen , then right-click on it and select an option as required like delete , Markup, or select the save option (location) .
Note : After capturing the screenshot/recording you can save it anywhere by clicking on the screenshot/recording. Additionally, you can even predefine the save location by clicking on the ‘Options‘ menu in the screenshot toolbar at the bottom .
Then Choose the default save location as Desktop , Documents , Clipboard , Mail , Messages or Preview under Save to set a save location .
5. You can easily edit the captured recording by right-clicking on the captured recording appearing in the lower right corner of the screen , then select the option ‘ MarkUp ‘
6. Click the trim button close to the top-right corner of the Quick Look window, then grab the hold points in order to manage the recording length and finally click on ‘Done‘
Best Free Snipping Tool Mac Alternatives Available !!
So the inbuilt snipping tool in Mac is indeed a useful option to capture screenshot/recording quickly . But you may even enhance and enjoy the other advanced screen capturing features with third party applications .
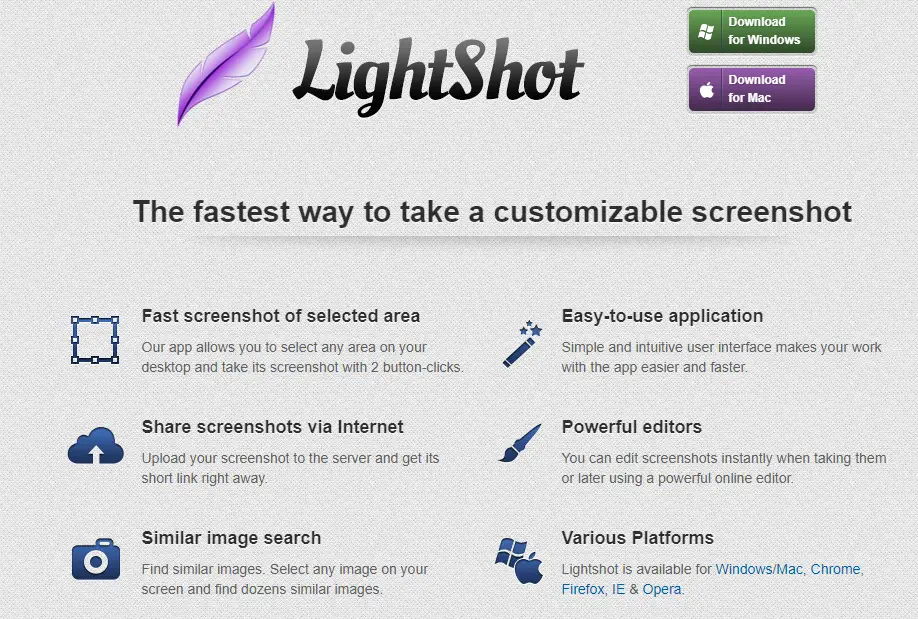
1. LightShot
This is the first Mac snipping tool on our list . It is really simple and has a very intuitive UI . You can easily capture great screenshots and can even annotate it by putting various text , shapes etc .
You can even share the screenshot with your team members by first saving it to your Lightshot’s server . With only two clicks you can easily capture the screenshot .
2. Skitch
This is another free screen capture utility , you can easily create well-crafted screenshots by using the built-in annotation features . There is also a provision of sharing the screenshots via the internet with others .
This is a well-known screen capture program that is created by Evernote . You can easily take multiple screenshots easily . With Skitch , you can capture your entire desktop, region, window, or scrolling screen .
3. CleanShot
CleanShot is also one of the best screenshot capture utility . In this, you can even hide the background desktop icons or can change the background wallpaper. It further provides a great option to annotate the captured screenshot .
In order to always capture your screen without all the desktop icons getting in your way, you need to set and use custom hotkeys in the Preferences menu of the CleanShot app .
It uses an in-built editor, highlights, or hides specific parts of your screenshots. In the Quick Access Overlay menu, click on the pencil icon to edit screenshots in a flash, add annotations, highlight what’s important, and blur sensitive content . Moreover you can also create custom wallpapers .
Snipping Tool For Mac – The Conclusion !!
So now after reading this post , you may take the sagacious decision of choosing the right snipping tool for you . In my opinion , the built-in screen capture utility is more than enough to meet our daily needs of capturing and annotating the screenshots and recording .
But anyways , if you want to enjoy some additional features and enhance the experience to the next level then you can opt for any paid application to meet your needs (there are free options available too) .
Hope you enjoyed this post , if you have any other useful snipping tool for Macbook in your mind, then do mention in the comments section. Stay tuned for the next post .

Aric is a tech enthusiast , who love to write about the tech related products and ‘How To’ blogs . IT Engineer by profession , right now working in the Automation field in a Software product company . The other hobbies includes singing , trekking and writing blogs .


