Apple Pay Not Working In iPhone/Mac/Apple Watch – Steps To Solve This !!
In 2014, Apple created the Apple Pay feature to incorporate mobile payment services with advanced technology. Best of all, this application is very easy to use, and you can make your payments from any Apple device. This application works through contactless technology so that you can make 100% secure payments.
Apple Pay turns out to be a useful application to make contactless payments in stores, apps, and websites. You no longer need to make payments using cards because this application provides you with everything you need to make comfortable payments from home or wherever you are.
All Apple Pay features are secure. You no longer have to worry about loading money on top as there are many authorized stores where you can pay with this application. Small, medium, and large companies have included this application as a payment method.
Steps To Solve The Apple Pay Not Working Issue Quickly !!
Follow the below-given troubleshooting steps to solve the Apple pay not working issue in your iPhone/iPad/Mac or in your Apple watch. So let’s go through the below-mentioned steps :
- Check whether the Apple Pay option is enabled to be used in the cellular data mode in settings
- Check for the location and region settings on your device
- Check whether the credit/debit card is active and no issues with the cards added to your Apple payments
- Check if the wallet option is turned ON for the touch ID (or face ID) and passcode option in your iPhone
- Remove and re-add your cards again to Apple pay. Close and reopen the wallet app.
- Try resetting all the settings to default. Also lastly if nothing works, then reboot your Apple device again.
Despite these petty flaws and issues, customers who use the Apple Pay service to make their payments are very much satisfied because they can make payments quickly. It is very difficult for you to find any error/flaw in the Apple Pay application when making a payment.
If this application does not work on your Mac, Apple Watch, or iOS, it is probably due to the incorrect registration of your card or some error in configuring the Apple pay wallet.
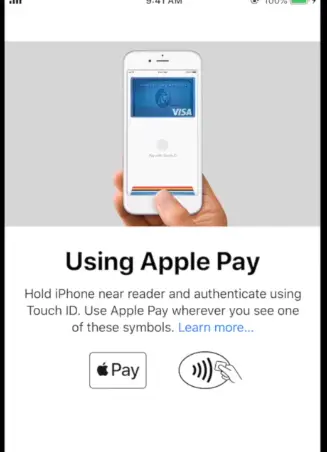
Therefore, you must register your credit/debit card and wait for the verification of your issuing bank to know that the approval has been successful. Once your issuing bank lets you know that your card has been verified, you can use Apple Pay from any device, make payments, or send money whenever possible.
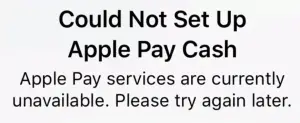
Now let’s see in detail the steps you need to follow in each of the possible use cases as seen below. So just sit back and read further.
Apple Pay Not Working On iOS Devices – Fix This Right Away !!
In iPhone, you will face most of the issues with the Apple pay feature. The steps are pretty easy and simple to follow. So let’s start with the most basic ones and then proceed further with the rarest ones you may experience gradually.
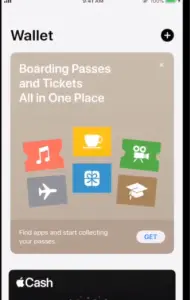
Note : Before fixing the issues with Apple Pay using the below steps, firstly check for any pending software updates (if any). Also, do check for the iPhone model i.e. Apple pay is supported by only the iPhone 6 and above and selected few models for iPad devices.
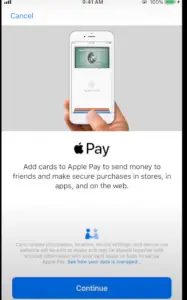
Needless to say, an active internet connection is a foremost prerequisite to use Apple Pay on your iPhone.
1. Apple Pay option is enabled to be used in the cellular data
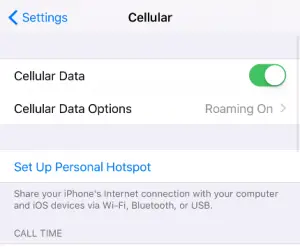
Firstly you have to allow the Apple pay app to be used with your cellular data while making contactless payments anywhere with your iPhone.
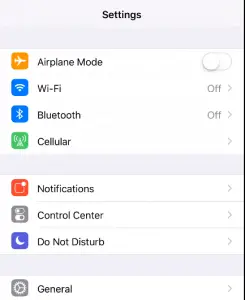
So for this just follow the path as given below :
Settings —> Cellular —-> Check the ‘Wallet’ option
Make sure it is already turned ON if its Off then do turn it On.
2. Check for the location and region settings on your device
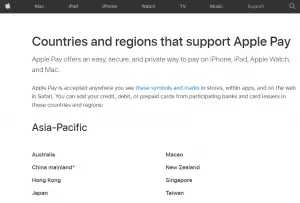
Currently, you can cot use Apple pay in every region as stated in the official Apple site. So you need to check whether mistakenly you have changed your region and location settings in your iPhone for using your card in a secure manner.
Settings —> General —> Language and region —-> Tap on Region —-> Check if your region already has Apple pay service enabled
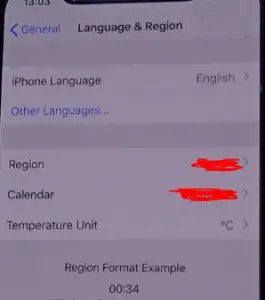
If you see some other unsupported region, then you have to change it to some other region that already present in the list of regions mentioned in this list.
3. Remove and re-add your cards again to Apple pay
Sometimes after you have added a new credit/debit card for payments, it may fail to load the card details after you do a software update or a system restart.
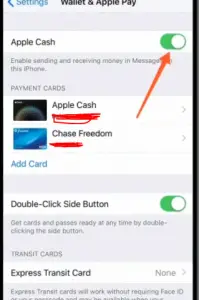
An easy solution for this is to remove the associated card and again re-add the card back to the Apple pay wallet:
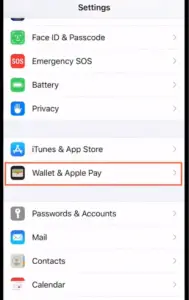
Settings —> Wallet & Apple Pay —> Select the card you want to remove —-> Restart your iPhone —> Re-add again the card back to the wallet
4. Check if the wallet option is turned ON for the touch ID (or face ID) and passcode option in your iPhone
Now we’ll check whether the wallet option is turned ON for the Face ID (or Touch ID) & passcode in the iPhone settings. Enter the passcode and then scroll down to check the ‘Wallet‘ option . Make sure it is turned ‘ON’ already .
Settings —> Face ID & Passcode —> Enter Passcode —-> Scroll down to Wallet option (in Allow access section)
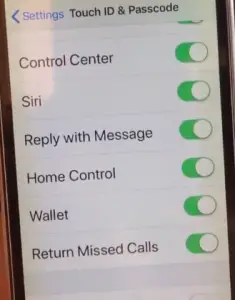
If the above setting is already turned ON , then just turn it Off and again turn it On (after sometime) .
5. Force close the wallet app from the background running apps and restart the Apple pay app again
6. Lastly, just reset all the iPhone settings to the factory default version
Just follow the below path in your iPhone settings :
Settings —> General –> Reset —-> Reset all settings
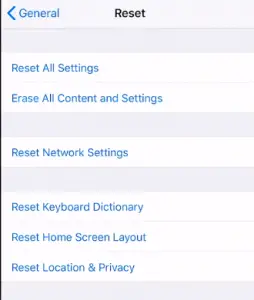
No menu for Apple pay error – How to fix it ?
This is also the most common issue using Apple Pay on the iPhone. The fix is really damn easy and pretty simple. If you don’t see the Add button in the wallet, the ‘+‘ option to add your card there. Just follow the below steps to fix this :
This issue is related to the region or the location that you have set up on your iPhone.
Settings —> General —> Language and region —-> Tap on Region —-> Check if your region already has Apple pay service enabled
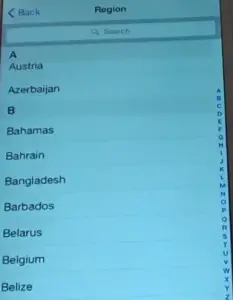
If you see some unsupported region, then you have to change it to some other region that already present in the list of regions mentioned in this list.
Now just go ahead and add the credit/debit cards here following the given steps :
Go to the Wallet option and press the circle with the + symbol
It will ask you to add a card (scan the card , it will automatically detect the card number and other details. Also you can manually add details if required)
Select the cards of your preference and only put in the security code (CVV on the backside)
If you are asked to download the App from your issuing bank to speed up the procedure, do it
In some cases, it’ll ask you to add a six-digit code
Then press next, then issuing bank will verify your information, and show if your card can be used in Apple Pay.
When you get the information, go back to the Wallet option and click on your card
Press next as soon as your card verification arrives to be able to use Apple Pay
Finally near any POS machine, just unlock your Apple wallet with Face/Touch ID and take your iPhone near that to pay the required amount.
“Apple Payment method Declined” Error – What To Do ?
Sometimes you may see an error message as ‘your payment method was declined’. For solving this issue, the fix is really simple as given below :
Sign out from your logged-in Apple account. Once you signed out, turn off your iPhone and again turn on iPhone. Finally, log in again to your Apple account.
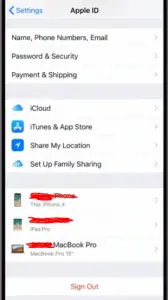
- Change your region in your iPhone (check if the selected region supports Apple Pay)
- Remove and re-enter the card details in the Apple wallet
- Check for your card details (might possible that the card validity has been expired or a penalty being imposed by your bank)
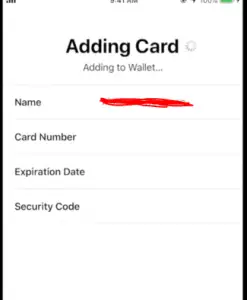
How To Solve The Error ‘Could Not Add Card’ In Apple Pay ?
This is also one of the most common issues faced by iPhone users most of the time. But not to worry anymore. So let’s see the possible fixes for the same as given below :
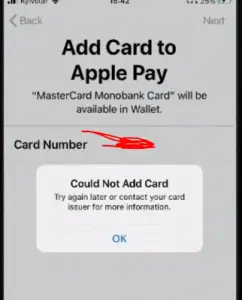
- Sign out from your iCloud account and then restart the device, then again sign in your iCloud account
- Select the region (country) in the iPhone settings that support Apple pay
- Turn Off and again Turn On the Apple pay (Settings –> Wallet & Apple Pay –> Make Off and On after few min)
- Reset all settings to factory default version (Settings —> General –> Reset —-> Reset all settings)
Apple Pay Not Working On Mac – How To Solve ?
Firstly add the Apple pay option correctly in your Macbook device. For this first in your iPhone, just enable the option ‘Allow payments on Mac‘ in the Wallet & Apple pay settings. Both iOS and Mac must use the same iCloud account.
Also to add a credit card in your Mac device, follow the given steps:
- Go to the Preference System
- Click on the card option
- These two steps are for you to add a new card. Enter the card number and enter the security code.
- Go to the next step. The card issuing bank will verify your information and determine if you can add your card to Apple Pay. When this step is ready, return to the preference system.
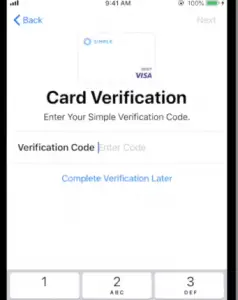
- When the issuing bank verifies your information, go to next.
- Thus, the process will be finished, and you can use Apple Pay from your iPhone
Mostly the Apple pay option will not work in a Mac device because of the account syncing problems. So the first step is to check for the iCloud credentials and then reboot your Mac device.
And now go to any e-commerce/website in your Safari browser to pay using the Apple pay option. Then just pay the desired amount using the Apple pay option.
Apple Pay Not Working On Website – A Quick Fix !!
Apple pay service is already enabled for most of the sites worldwide. Still, if you don’t see the Apple cash option on the payments page, then probably the site doesn’t support Apple Pay yet. You may even contact their customer support for the same.
Also if the Apple pay option is present at the checkout page, still you can’t able to make the payment then precisely you need to follow the above-mentioned troubleshooting steps indeed.
Also just for safer side, do a page refresh and clear site cache/cookies, then again try paying the amount using Apple pay option. Finally for using the Apple pay option efficiently just follow the below steps :
- Go to the Apple Pay application when you go to make your purchase
- Press the Apple Pay button
- Review the payment information
- You will have the option to change your credit card, contact information, or address.
- Complete the payment when authenticating with Face ID or with your code
Apple Pay Not Working To Send/Receive Money – Steps To Solve !!
You can easily send Apple cash directly through the messages app right away. However, sometimes you do face hiccups. The most common errors and their solutions are as follows :
1. Make sure you are eligible to use Apple Pay/cash for sending and receiving payments. (Age should be above 18 years and a resident of US)
2. Do check for any pending software updates.
3. Check for an active internet connection and if the wallet option is enabled in the recipient’s iPhone settings.
4. Double-check the credentials used to sign in to the iMessage and iCloud applications. Both should be the same.
5. Do check for the limit to send/receive money. (try to send lower amounts)
6. Lastly, if nothing works then kindly contact your card issuing bank right away.
7. Now if you want to send money with Apple Pay, just follow the below basic steps :
It is not necessary to download any application
Use the card you already have in the Apple Pay Wallet
Tap on the Messages app option
You can choose to use a quantity as default (or enter manually)
When you sent money, for the other person money will be added to their Apple Cash card in Wallet.
If you want to send money by messages :
Touch the Apple Pay option and enter the amount of money you want to send
You can have a predetermined amount of money to speed up the shipping process
Touch the option to pay, and if you want, you can leave a comment in the optional part.
You must review your payment information. If you do not have enough funds in your Apple Cash, you can use your Wallet debit card.
For the authorization of the payment, you can use Touch ID, Face ID or your six-digit code
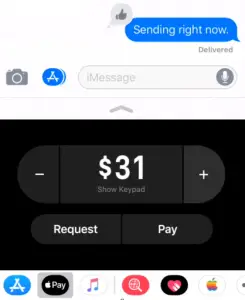
If you mistakenly sent money to the wrong person, ask them to return. Or else if they don’t accept payments, it will be returned to you automatically (after 7 days). If Your Payment Has Not Been Processed, You Can Cancel It
- Touch the balloon of the payment option
- Choose the option ‘cancel payment‘
Apple Pay Not Working On Apple Watch – Possible Solutions !!
Weirdly enough you need to add cards again to your Watch app separately, in the Wallet and Apple Pay section. So if the Apple Pay is not working on Apple Watch, then just above mentioned things once again (already discussed in the above sections).
Do check for internet settings, card details, location/region settings, enable Wallet option (if not already) etc in the Watch app present in your iPhone.
- Go to the Apple Watch app and locate the tab of your watch. If you use multiple watches, choose one.
- Press Wallet and Apple Pay.
- Add the card to be configured and enter your security code. You can use one or more cards. Depending on the country, then create 6-digit code security code.
- Press the following option
- The issuing bank will verify your card to see if it can be used in Apple Pay.
- After verification return to Wallet and Apple Pay
- Click on your card option
After verification, press next, and your card will be ready to be used with Apple Pay.
Lastly, if nothing works for you then you don’t hesitate to contact your card issuing bank for support. After all these steps, the only thing you can’t fix is the card related issues (some penalty from the bank or some spending restriction imposed on you, etc)
Hope you really liked this post regarding the ways to solve the Apple Pay not working issue quickly. Let me know if you have any other better solution to the above problem in the comments section.

Aric is a tech enthusiast , who love to write about the tech related products and ‘How To’ blogs . IT Engineer by profession , right now working in the Automation field in a Software product company . The other hobbies includes singing , trekking and writing blogs .

